In Search of the Perfect Bubble Bath

Bubble Bath

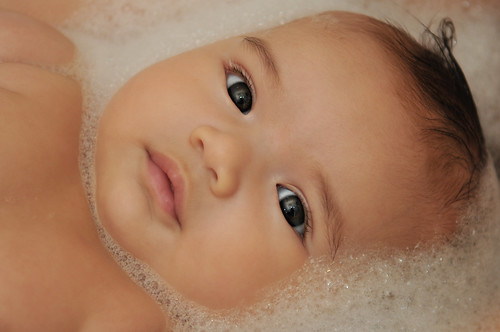
Bubble Bath by Quan Ha

I love all things that smell divine, and that includes a good bubble bath. With two small children, we take a LOT of bubble baths at my house, so I thought it’d be fun to make a deliciously scented one that was good-for-us, too. How hard could it be?

No Effort: Buy It
The effortless way is just to buy the stuff. Some good brands that use eco-friendly and baby-safe ingredients are:

Custom Scent Bubble Bath (Easy-Mode DIY)
But what if you want a custom scent? Well, there’s an easy DIY way to make your own aromatherapy bath:

  1. Use an unscented gentle, eco-friendly kids’ bubble bath (we use California Baby)
  2. For babies and children, mix 6 drops of your favorite essential oils* per 1 oz of bubble bath (for adults, you can safely use 25 drops a.k.a. 1/4 tsp per 1 oz of bubble bath)
  3. Add 1/2 to 1 tsp** bubble bath to running water as tub fills – and voila! – a scented bath with no harsh chemicals and delightful foam!

*Some of the best and safest essential oils for children are lavender, tangerine, mandarin, neroli, frankincense, petitgrain, and Roman chamomile. Source: Aromatherapy: A Complete Guide to the Healing Art.
**You can add more bubble bath for more foam, just be aware that with babies and kids – 1/2 to 1 tsp is the recommended amount to keep the essential oil exposure low. Same source as above.

True DIY Bubble Bath
But what if you really want to make your own eco/kid-friendly bubble bath from scratch? The above brands cost a fortune, and you just don’t get the same “I made it myself!” satisfaction from using a pre-made bottle. I bounced around Google and Pinterest and the usual natural/crafty blog suspects, and every bubble bath recipe seemed to be a variation on the Castile soap + vegetable glycerin formula. Some with water, some without. Some with sugar or salt, some without. Some with more or less vegetable glycerin. Hunh.

Crunchy Betty offers two well-thought out bubble bath recipes, so I thought I’d give them a whirl this weekend.

The Castile Soap + Vegetable Glycerin Recipe
This one promised the most bubbles, so I thought I’d try it first. I’ll save you the suspense: in our hard water, the bubbles fizzled out almost immediately. BOO! Bubble disappointment! But, to be fair, Betty totally warned us. That said, the vegetable glycerin (harmless stuff, btw) left our skin feeling soft and silky smooth, and the bath smelled yummy too!

Here’s what you need to make ~5 ounces of not-very-bubbly bath:

Ingredients

Steps

  1. Whisk ingredients together in a small bowl.
  2. Transfer to a jar with a lid.
  3. Let sit 24 hours before using.
  4. Pour ~1/4 cup (2 oz) into running bath water.

This recipe makes enough for ~2-3 baths. Stores up to 3 mos (supposedly, I have not tested this) in a cool, dark cabinet.

Okay, so what about the second option? By this point, I’d dropped all expectation of bubbles. This was another easy recipe that came together in a snap. It smells yummy and makes your skin feel delicious – but, no bubbles.

Creamy Honey Bath (also from Crunchy Betty)
This makes ~7-8 ounces of bath mixture, enough for ~1-2 baths. Store in a cool, dark cabinet and (supposedly) it will keep for 3 mos.

Ingredients

  • 1/4 cup sweet almond oil
  • 1/8 cup honey
  • 1/2 cup Castile soap
  • 3 teaspoons pure Vanilla extract (get the kind with no added sugar or artificial flavors)
  • 5 drops essential oils (you can use Vanilla or something else)

Steps

  1. Whisk ingredients together in a small bowl.
  2. Transfer to a jar with a lid.
  3. Pour 1/2 to entire amount into running bath water.

So…now what? I still have not fulfilled my quest to find the perfect DIY bubble bath recipe. Now, some might say that the problem is surfactants – the chemicals that create a nice lather – and that these harsh things are just not what a person with common sense would want in the tub.

And I’d agree, except…a little sleuthing of ingredients revealed that California Baby, Honest Company, and 100% Pure all use gentle/plant-based surfactants that seem like the sorts of stuff I’d want to use!

So now I just need to find a recipe with a combo of those ingredients and figure out where to source them. With the exception of saponified coconut oil, I suspect they are not as easy to get. So, the search continues! Do you have an all-natural bubble bath recipe that actually makes bubbles? If so, I’d love to know!

How to Dilute Perfume Materials

Ah, perfume making! It’s so romantic, so poetic…so FULL OF MATH.

Why dilute?
Perfumers often need to dilute their materials to 20%, 10%, or sometimes even 1% or .5% or more before adding them to a blend. This serves a number of purposes – from wasting less material while blending to making it easier to work with trace amounts of strong-smelling materials.

What material to use as a diluting agent?
Typically, you’ll want to dilute in perfumer’s alcohol. You should dilute in whatever medium you would be working in – so if you are making oil-based perfumes, dilute in oil. Some people prefer to dilute in Dipropylene Glycol (DPG), which is a common odorless solvent that is completely soluble in water, alcohol, and some oils – and it also is a humectant (attracts water) and has fixative properties. A strictly all-natural perfumer will not want to use DPG since it is a synthetic, but if you’re concerned about safety, don’t be. According to the Environmental Working Group, DPG is safe / very low risk.

Use Weight/Weight Dilutions
An important consideration is that when professionals are talking about dilutions in the perfume industry, they are talking about diluting by weight rather than by volume. So assume all dilutions on any materials you purchase or for any formulas are listed in weight/weight.

Creating a Dilution from Materials at 100% Concentration
Creating a dilution from 100% pure raw material is relatively straightforward.  In the chart below are the ratios in generic “parts” – this would work for drops, ml, grams, etc. as long as you keep the units of measure consistent – but as I mentioned, most professional perfumers work by weight (grams) – so let’s assume this is grams.

If you don’t want to do the math, here is a weight/weight dilution calculator.

You can also check out this nice tutorial on dilutions and blending from Chris of Pell Wall Perfumes. He gives a very thorough step-by-step approach.

Aroma Material Dilutant Total Parts Percent Dilution
1 1 2 50%
1 2 3 33%
1 3 4 25%
1 4 5 20%
1 9 10 10%
1 19 20 5%
1 99 100 1%
1 199 200 ½%

Creating a Dilution from Materials at Different Concentrations
What if you want to do something a little more complicated? For example, I have a bottle of Benzoin Absolute pre-diluted to 50%.  I have a perfume formula that calls for Benzoin at 20% dilution.  How do I dilute a 50% solution to 20%? (These are the questions that make former English majors clutch their heads in agony and wish they’d paid a little more attention in Chemistry lab.)

Well, it turns out there’s a relatively straightforward formula for this: C1V1=C2V2.  C=Concentration and V=Volume. Now, I don’t want to do this by volume – I want to do it by weight. If I wanted to be super accurate, I should probably take into account molecular weight. But since the amounts I’m dealing with are relatively low and I don’t need to be that insanely accurate, I’m not going to worry about molecular weight. (Also, if a chemistry person is reading this and wants to explain how to do this absolutely properly, I’m all ears! Please comment!)

Okay! So let’s figure this out. How do we dilute a 50% solution to a 20% solution? I’m about to do some math. If, like me, math makes your head hurt – you can skip the pain and go use this handy-dandy dilution calculator.

But hey, if you want to see how the math works, here goes. I already know my concentrations. All I have to decide is what final weight I’d like to end up with. For kicks, let’s decide on 5 grams final weight.  So!  Here’s how it would work out:

C1W1=C2W2

    • C1 = 50% = .5
    • W1 (the weight of the 50% solution to add) = unknown
    • C2 = 20% = .2
    • W2 = 5 grams

.5(W1)=.2*5g
.5(W1)=1g
W1=2g

So, okay – now I know that I need 2 grams of my starting 50% solution, and I want to end up with a final weight of 5 grams. So 5 grams – 2 grams = 3 grams. Which means I need to add 3 grams of my diluting agent (alcohol) to 2 grams of the 50% material to get 5 grams of 20% material. Or…

Starting % Ending % How many grams First solution? How many grams diluting agent to add? How many grams final solution?
50% 20% 2g 3g 5g

That’s it! Do you have a better method for calculating dilutions? If so, please comment! I’d love to hear from you.

The DIY Perfume Lab

99 Bottles of Tonic on the Wall ...

Niagara Apothecary in Niagara-on-the-Lake, Ontario

Designing Your Workspace

When designing your workspace, one of the first things to consider is air quality. Essential oils and aroma chemicals are, of course, smelly! Good ventilation and odor containment are important considerations when setting up your lab. For your own health, and also for your ability to detect differences between scents, you need to keep the fragrant “noise” to a minimum. Some options to consider:

  • Install an exhaust fan (like the kind you find in bathroom ventilation).
  • Manage the trash. Use a can with a lid that seals.
  • Store raw materials in cabinets with doors that shut (glass or plastic doors allow view of bottles).
  • When testing perfumes on scent strips, consider using a bell jar, or a homemade one out of plastic bottle.
  • Wear disposable latex gloves to avoid contaminating your fingers.

Your “bench” or worktable may be subject to aroma chemical spills from time to time, so choose a non-reactive, non-absorbent surface that’s easy to clean. Some options:

  • Stainless Steel – food prep tables from restaurant supply companies work well, for example.
  • Formica
  • Glass top – tempered is best.

Refrigeration. Some aroma chemicals, like the citruses, will have a longer shelf life when refrigerated. Consider getting a mini fridge or a wine fridge.


Lab Equipment List

Lab Notebook – Always take notes. Take notes when smelling and familiarizing yourself with a new chemical. Take notes as you formulate a new blend. Note what works, note what doesn’t. Note everything.

Digital Scale accurate to 0.01g – Perfume industry professionals measure raw materials by weight. Ohaus makes a pricy but nice scale. And there are less expensive options, too. Several good people on Basenotes recommend this one from Old Will Knot that seems to have all the right features at a good price.

Tiny Glass Beakers – If you are working by volume (many recipes are in drops/ml), you’ll want to be able to measure accurately in ml. Look for beakers with small graduations (10, 15, 30 ml). You can find these at lab supply companies or nifty vintage beakers on eBay. These 25 ml graduated beakers at Aqua Oleum in the UK are some of the most ideal beakers I’ve seen, and very reasonably priced.

Pipettes or droppers

Stirring rods

Tiny funnels. You can also get them in glass.

Fragrance Tester Strips

And maybe something like this to hold all those test strips, or like this. Or possibly this. I’ve also heard you can use chopstick rests.

Casseroles – for melting small quantities of beeswax if you are making solid perfumes.

Curettes for scooping out viscous and resinous absolutes like vanilla, benzoin, and fir. You can find them in bamboo or stainless steel.

Hot Plate
If making solid perfumes, you will need a heat source. You can work over your kitchen stove with a double-boiler – or if you’d prefer not to work in your kitchen, you can get a hot plate as an alternative heat source. There are a range of options.

Education for the Aspiring Perfumer

Classes and Schools
Laurie Erikson of Sonoma Scent Studio has an excellent list of Perfumery Classes and Schools around the world. Pia Long, a Finnish perfumer in England, followed a non-traditional route and writes a lovely account of how to become a perfumer and her own personal journey.

Online Forums

Blogs / Web sites

Books

  • An Introduction to Perfumery by Curtis and Williams
  • Perfumery: Practice and Principles by Robert R. Calkin and J. Stephan Jellinek
  • Perfume: The Alchemy of Scent by Jean-Claude Ellena
  • The Diary of a Nose: A Year in the Life of a Parfumeur by Jean-Claude Ellena
  • What the Nose Knows by Avery Gilbert
  • Perfumes: The A-Z Guide by Luca Turin and Tania Sanchez
  • Essence and Alchemy: A Natural History of Perfume by Mandy Aftel
  • Fragrant: The Secret Life of Scent by Mandy Aftel

Perfume Samples

Recipes, Formulas, and How-To’s

Measurement Conversion Chart

When working with essential oils, the most common conversions you typically need are:

  • 20 drops = 1 ml
  • 100 drops =1 tsp = 5 ml
  • 300 drops = ½ oz = 15 ml
  • 600 drops = 1 oz = 30 ml

But, sometimes a little more detail is in order:

Drops Teaspoons Ounces Drams Milliliters
10 drops 110 tsp 160 oz ~18 dram ~½ ml
12 12 drops 18 tsp 148 oz 16 dram 58 ml
25 drops ¼ tsp 124 oz 13 dram 1 ¼ ml
50 drops ½ tsp 112 oz 23 dram ~2 ½ ml
100 drops 1 tsp 16 oz 1 13 dram ~5 ml
150 drops 1 ½ tsp ¼ oz 2 drams ~7 12 ml
300 drops 3 tsp ½ oz 4 drams ~15 ml
600 drops 6 tsp 1 oz 8 drams ~30 ml
24 tsp 8 tbsp 4 oz ½ cup ~120 ml
48 tsp 16 tbsp 8 oz 1 cup ½ pint
96 tsp 32 tbsp 16 oz 2 cups 1 pint

Source: Aromatherapy: A Complete Guide to the Healing Art by Kathi Keville and Mindy Green.

This chart makes the common assumption that 20 drops = 1 ml. However, always remember that drops vary in size based on liquid viscosity and the dropper or pipette you are using. If you want certainty, conduct a test with a calibrated beaker to see how many drops = 1ml.

For example, in Mandy Aftel’s book, Essence & Alchemy, she assumes that 40 drops = 1ml. Double the common assumption! I recently tested this myself using a glass eyedropper and found it to be absolutely accurate. So definitely check before moving forward with a recipe or formula.

Eden Botanicals offers a more detailed range for how many drops = 1 ml, and so far this matches my experience as well:

1 ml = 30-50 drops, depending on viscosity and size of the drop; aprox. 40-50 drops per ml for very mobile oils such as some citrus oils and fir needle oils; more viscous (thicker) oils such as Vetiver and Sandalwood will be approx. 30-40 drops per ml.

1 oz = 30 ml. Using these measurements, it can be extrapolated that there are approx. 900-1500 drops per ounce.

Notice how there are more than double the number of drops in the first estimate (600 drops = 1oz) and the Eden Botanicals estimate (900-1500 drops = 1oz)? Yikes.

This variability is why professional perfumers measure in weight with accurate lab scales. Still, if you’re just messing around at home, drops are far easier and most beginner recipes are calculated in drops. For more conversions, try this handy Volume Unit Converter site.

Aging Perfume Blends

Aging

Aging by Bob AuBuchon

I’m not a particularly patient person. So – ARGH! – I was horrified to discover that in this perfume crafting business you need to let a blend age to let the scents marry. Fragrances will change as they mature, and after aging they become much more seamless, rounded, and soft.

Le sigh.

Advice about this process varies. Generally speaking, there are two times you can age a blend: before and after dilution.

Which brings up another point: Most people advise combining your raw materials to create your fragrance blend first, prior to adding it to your carrier medium.

After mixing your blend of raw materials, store it in a dark bottle in a cool place to let it age. Sources vary on how long. Some DIYers seem to skip this step, others recommend anywhere from 1 week to 2-3 weeks.

The most commonly given advice seems to be 48 hours to 1 week, averaging out at around 4 days.

Then, sniff the blend. If you’re happy with it, dilute with a carrier oil (jojoba or fractionated coconut oil are best; they have the longest shelf life of oils) or perfumer’s alcohol (much better shelf life than oils – basically indefinite).

After dilution, most sources agree you need to let an alcohol-based perfume age 4-6 weeks. For an oil-based perfume, try 3 days to a week.

Oh, the waiting! I guess I’ll have to get used to it.

Update:

  • In Essence & Alchemy, Mandy Aftel recommends letting an alcohol-based blend mature for at least a week, and up to a month if you can stand it (this is after dilution).
  • In Perfume: The Art and Craft of Fragrance, Karen Gilbert recommends letting an alcohol-based blend macerate for a week or two before using.

How to Smell

“Notice:

  • the layers of a smell (one-dimensional or complex and layered)
  • the shape of a smell (pointed, sharp, rounded, dull)
  • the memories it conjures
  • the feelings it arouses

Ask yourself: If this fragrance were a color, what would it be? Allow the smell to open itself to you, and discover whatever about it is most beautiful, most remarkable to you.”  – Mandy Aftel, Fragrant: The Secret Life of Scent

190 Proof!

190 Proof!Every journey has to begin somewhere, and it may take to you funny places. Today I found myself, a suburban mother of two, in Tony’s Liquors asking for a bottle of Everclear.

I immediately blushed, explained that it was for perfume, and then told a long rambling story about how I hadn’t thought about PGA since the ’90s when we used it for Hunch Punch. Then I was embarrassed I’d said THAT, babbled some more, blushed more, and ran out while the cashier and owner chuckled.

Outside, a panhandler hit me up for $1 (still discombobulated, I gave him everything in my back pocket) and asked what I was drinking. “I’m not drinking it, it’s for perfume!” I waggled my bottle at him and smiled as I hopped in the car, worried he’d ask for some. But instead he asked, “Cool, is that what you do?”  I paused. “Yes. I mean, it’s just a hobby.”  He smiled.

I guess this is what I do? Cheers y’all. So begin the adventures.